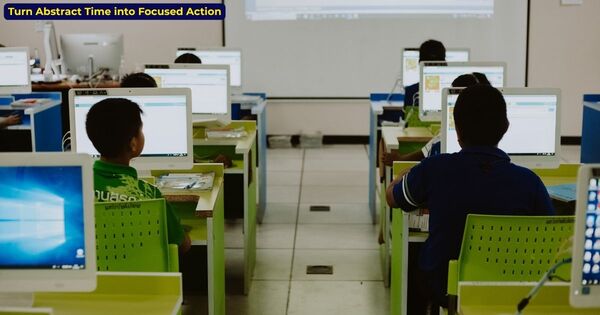

Students with autism and ADHD often struggle with “time blindness,” which makes time feel abstract and unpredictable.
For these students, moving between activities can feel like a sudden, jarring disruption. Implementing visual timers for SEN classrooms helps bridge this gap.
By turning the invisible passage of time into a shrinking visual shape, you give students a constant, predictable anchor.
This allows them to focus on the task at hand instead of worrying about when it will end, effectively offloading the mental effort of tracking time onto a simple, external tool.
The Mechanism of Visual Timers in the SEN Classroom
Visual timers serve as a functional bridge between a teacher’s expectations and a student’s ability to comply. In a busy classroom, verbal instructions such as “five minutes left” are often lost or misinterpreted due to auditory processing delays. A visual timer functions as a constant, neutral authority that remains visible throughout the lesson.
Because it provides an unchanging reference point, it removes the need for teachers to offer constant verbal reminders, which can sometimes be perceived by students as intrusive or anxiety inducing.
By relying on an online timer for behaviour management, educators create a more predictable environment.
This allows students to self monitor their progress without needing to initiate an interaction with the teacher, fostering the independence and task sustenance necessary for successful classroom integration.
When these tools are integrated into a daily schedule with timers, they provide a comprehensive system that supports focus strategies for students with ADHD, ensuring that every student has the external structure required to succeed.
Using Data to Personalise Timing Intervals
Not every student benefits from the same duration of focus. In a SEN setting, the “one size fits all” approach to time management often leads to either student burnout or total task disengagement. To maximize the effectiveness of a visual timer, you must align the time interval with the student’s current level of focus stamina.
Research suggests that starting with a “win” is critical. If a student consistently struggles to focus for 10 minutes, forcing them to sit through a 20-minute session will likely result in a breakdown.
Instead, use a 5 minute timer for kids to establish a baseline of success. Once the student demonstrates the ability to remain on task for that period, you can incrementally increase the duration.
This data-driven approach allows you to build “focus muscle” safely, ensuring the student associates the timer with achievement rather than pressure.
By tracking how a student responds to different intervals, you can identify their “optimal work window.” For some, frequent, short bursts of activity followed by quick movement breaks are the most effective way to prevent sensory overload and sustain attention throughout the school day.
Promoting Self-Regulation Through Predictive Transitions
While visual timers are excellent for tracking active work, their true value in a SEN classroom is the mastery of transitions.
Many students with autism experience heightened distress during closed transitions, where a task ends abruptly without prior warning.
To help with this, teachers should give clear advance notice and use visual supports to properly prepare students for transitions so the student can get ready for the change in activity.
By placing a timer in a location visible to the student, you allow them to initiate their own wrap-up process.
This moves the teacher from the role of an enforcer to that of a facilitator. For example, when using a 25 minute timer tactical stack for a longer activity, the student can observe their own progress and mentally prepare to conclude their work.
This agency is a massive step toward self-regulation. Instead of being told to stop, the student observes that their time is expiring and chooses to finish their sentence or tidy their station.
This subtle shift in power dynamics significantly lowers defiance, as the student is responding to an objective tool rather than a subjective demand from an adult.
This practice also builds the executive function skills necessary for life beyond the classroom. Learning to monitor one’s own pace and knowing when to speed up or slow down is a foundational skill for managing time in adulthood.
By encouraging students to keep an eye on the timer based goal setting process, you aren’t just managing the current lesson; you are training the student to manage their own behavior in increasingly independent environments.
Standardising Your Classroom Transition Protocol
Transitioning between tasks is often the most volatile part of the school day for neurodivergent students.
Without a consistent framework, you are forced to rely on verbal prompts that can inadvertently increase student anxiety.
To solve this, you need a repeatable process that removes the guesswork from classroom management.
By implementing a standardized system, you turn transitions into a predictable routine that students can anticipate and master.
The following protocol provides a step-by-step checklist to help you effectively use your visual tools, ensuring that every shift in activity is supported by objective data rather than subjective teacher demands.
The 5 Step Transition Protocol
Use this checklist to standardize your transition support and build student autonomy:
- Step 1: The Pre-Warn. Use a 5 minute timer to provide a time remaining warning at the 5 minute and 2 minute marks.
- Step 2: The Visual Anchor. Place the timer in the student’s direct line of sight. It must be accessible without them needing to look away from their workspace.
- Step 3: Goal Alignment. Clearly state the goal for the current session to ensure the student understands the structure, ideally paired with best study techniques to maximize their focus.
- Step 4: The Closing Ritual. When the timer concludes, allow for a 30 second cool down or tidy up phase to prevent transition panic.
- Step 5: The Reflection. Ask the student how they felt about their focus. This builds self awareness and helps support executive function over the long term.
Optimising the Sensory Environment for Focus
Visual tools do not operate in a vacuum. A student’s ability to engage with visual timers for SEN classrooms is directly influenced by the sensory load of their surroundings. If the environment is too chaotic, even the best timer will be ignored because the student’s nervous system is stuck in a state of high alert.
To optimize your space for sustained attention, consider these environmental calibrations:
Environmental Calibration Tips
Visual tools do not operate in a vacuum. To maximize their impact, use this checklist to calibrate your classroom sensory environment:
Frequently Asked Questions: Refining Your Strategy
What if the timer sound triggers sensory overload?
Many students with sensory processing differences find harsh alarms distressing. Opt for silent visual timers, where the only indicator is the shrinking shape, or use a soft, customizable chime rather than a jarring buzzer to maintain a calm atmosphere.
Can I use these tools for group activities as well as individual work?
Absolutely. While we focus on individual regulation, using a large, centralized display for group tasks helps normalize the expectation that everyone is working until the shape disappears. This builds a collective classroom rhythm, reducing individual anxiety during transitions.
Is it better to have a digital timer or a physical one?
Digital timers offer superior flexibility, allowing you to quickly adjust intervals for different needs. Physical timers are great for younger children who need a tactile connection, but for ongoing adaptability and data driven management, a digital platform is far more versatile.
Ready to Implement These Strategies?
Take control of your classroom flow today. Access our specialized classroom timer tools designed to support focus and ease transitions for every student.
Try Our Classroom Timer Now